Æbleskiver – a Danish Sweet Treat
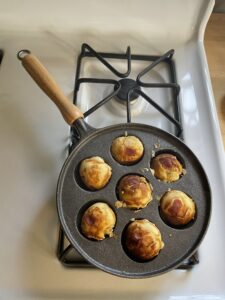
One of our favorite Scandinavian breakfast goods are these delicious pancake balls from Denmark, æbleskiver. Light and fluffy, savory and sweet, æbleskiver have gained global popularity over the last decade. Like many Nordic foods, æbleskiver do require a special pan, aside from that, they can be quite easy to whip up!
We’ve included a classic recipe below. This batter will suit savory or sweet fillings.
Some of our favorite fillings and toppings are:
-
Jam – lingonberry, strawberry, raspberry, any type you please
-
Cheese
-
Cured meats – can accompany a cheese filled æbleskiver as a topping (that gets crispy in the pan)
-
Chocolate
-
Lemon curd
-
Fruit – like diced apples with cinnamon or Scandinavian Sprinkle
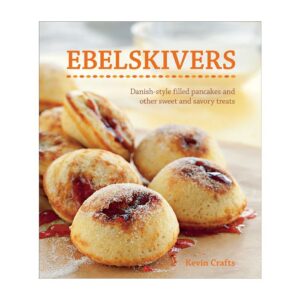
If you are an experienced æbleskiver maker, looking to take your skills to the next level, or you love flavor varieties, Kevin Crafts’ Ebelskivers has an entire book’s worth of flavored batters and filling combinations. He also has an excellent basic batter recipe.
How to make æbleskiver
(Full recipe and ingredient list below)
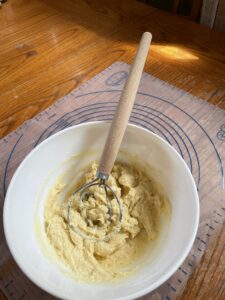
1. Mix the batter
It never hurts to have a Scandinavian Dough Whisk around. These well designed whisks, also known as brodpisker, are originally from Denmark and are designed to mix even stubborn bread doughs. Their stiff metal holds up without overmixing your doughs and batters, and the round shape makes bowl scraping easy.
The batter will be lumpy, and because you’ve spent time whisking the egg whites, keep the batter fluffy by gently folding everything together.
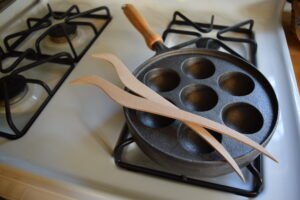
2. Prepare the pan
If you’ve just purchased your new cast iron pan, make sure to wash it initially, and then proceed with seasoning it with oil. The first (and only) wash should be in hot soapy water. Follow with a coat of oil and put in the oven or on the stove top until the oil begins to smoke, cool and wipe off excess oil. Your pan is ready to go! Before you put the batter in the pan, put a dot of butter or shortening in each hole, to prevent sticking and make them easier to turn. (If you opt for a non stick pan, you can simply wash and go!)
3. Select fillings
Before you get going with your batter, make sure your fillings are prepped and ready: cheese diced, fruit cut, jam opened, so that once you need them they are ready to go!
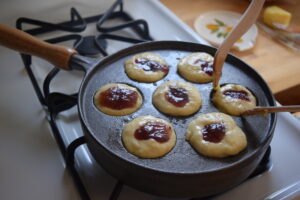
4. Fill the pan
(If you’re putting meat, like a small slice of bacon, or a fresh herb leaf like sage as a topping, place in the holes before putting batter in). Spoon the batter into each hole, about 3/4 full. Add desired fillings if using. You can add a small dot of batter on top of the filling if you don’t want it to leak out on the other side.
5. Flip the æbleskiver

One set of tools we cannot recommend enough is a pair of wooden aebleskiver turners! These designed wooden sticks are curved with points on the end to help navigate the dough balls, for an even cook. Poke the edges until they begin to turn. Each side should only take a couple of minutes to turn a golden brown and cook through. They will be soft.
6. Don’t aim for perfection
This is the best piece of advice we can give. As long as they taste good, don’t worry what your æbleskiver look like. Often, they will not be fully round, the filling leaks out, or an overfilled batch have little dough belts around the middle. All are perfectly welcome at our breakfast table.
Find a printable recipe here:

Will an electric flat topped stove work as well? I have been afraid to try because that is what I have.
Yes! As long as you have a compatible pan, it should work just as well.
There are different types? Where can I order?
Thanks
You can find several options here, I would say for a flat top electric a non-stick pan would be the best bet. You could also opt for an electric that would work totally separate from your stove!
https://www.ingebretsens.com/shop/kitchen/cookware/aebleskiver
Thanks. I enjoy my electric krumkake iron very mush.
The star of our Christmas morning brunch. Part of my Danish heritage (Mortensen & Jacobsen). I remember eating them at my grandmothers home and my mother also made them. My mother gave each of her seven daughters their own pan. It was one of the first things that I gifted to my sweet daughter-in-law. She now has taken over Christmas brunch and is an expert at making Ebelskivers.
What a sweet memory, and having an expert family member who makes them? Sounds great.
I have my grandmother’s aebelskiver pan. While she used a knitting needle to turn then, I prefer my Cutco two pronged meat fork! Will have to make some this weekend!
A knitting needle is a common solution! But the meat fork sounds deluxe. Happy cooking!
The recipe makes no mention of the following:
What is the yield for this batter (based on 2 tablespoons of batter per treat);
At what temperature should the burner be set? Medium? Medium-high? Should it be set to high or medium-high until the cups are buttered and then lowered a tad to prevent burning; or keep everything at consistent level (one thinks of popover and pannenkoeken batters that start out in a searing hot pan, but oven temp is lowered once to twice so it gets airy/fluffy and moist on the inside and not burned on the outer crust).
Our apologies! This recipe serves 4-6, depending on how hungry the eaters are. A consistent medium throughout works well. You will probably end up adjusting down a bit after the original contact is made so as not to burn the outside.
I have this pan from my Norwegian Grandmother (Born in Arndal, Norway). She called it her Monke pan. I also have her recipe, which is similar to yours.